 |
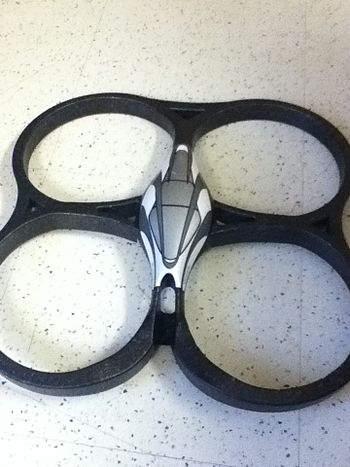
| (Photo credit: Wikipedia) |
Building your very own drone has never been easier as a result of the technology that is available nowadays. Drones used to be something that you would only ever hear about on the news or something that you would read about but not now. Now, we can purchase our very own drone and even a step further, we can make our own.
The first step to building your own drone is to decide on what design you wish to emulate, this will in turn decided the parts that you will need. Do you want speed? If so, you need to build a fixed-wing drone. However, if you wanted precision then a multi-rotor drone is what you require. If you choose to build a multi-rotor, your options then increase again as there is many different shapes and designs to choose from. You can decide to have an ‘x’ shape, a ‘+’ shape or even a ‘y’ shape with two propellers on each arm.
The next step is to choose the base of your drone. Many years ago, sensors were not quick enough to react to the push of a button but with the advancements of technology, there is now many to choose from. Many different manufacturers offer a central, focal point to your drone that specialise in navigation as well as altitude (through the pressure sensors). You need to choose a system to your drone that best represents what you are trying to achieve, whether it is stability whilst in flight or speed. There will be a circuit board in this device that will react to your hand-held device with which you wish to fly the drone with. If you are willing to invest the money, you will also find main frames that will allow you to pivot the camera (once installed) up and down as well as send the video down to a device on the ground via Wi-Fi or any other internet connection. As previously mentioned, if you wanted a camera on the drone, this will also need to be integrated into the system.
So now you have the heart of your drone, you have the electronics, the sensors, the camera and all the wires that are going to make this thing work but now you need to create a frame. You need to choose a material that will be resistant to damage but also hides away the main system; you want to keep all the wiring hidden from view. Carbon fibre is one of the most popular materials for drones as it is light yet extremely strong. It is also great for reducing the vibrations which will improve your drone’s ability to remain steady whilst in the air.
 |
| (Photo credit: Wikipedia) |
The final step is to attach the arms of your drone that hold the propellers. Depending on your design, it may be easier to add the arms before the body; you may also want to improve the aesthetics of your drone as well as efficiency by adding foldable arms for easier storage and mobility.
All that’s left to do now is to make sure that everything is complete. Ensure that the main system is completely wired and that the sensors will react to your remote. Ensure that your drone will actually work and is a reasonable design to stay up in the air. Ensure that your camera is linked up to a device on the ground. Once all this has been checked, it’s time to give your drone its maiden test flight!
No comments:
Post a Comment